The new Apple M1 iMac is more screen than computer
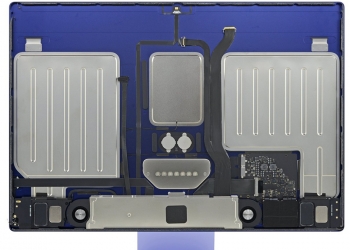
Apple's new colourful M1 iMac is finally available for purchase in Malaysia, but do you know what's under the hood? ...
Apple's new colourful M1 iMac is finally available for purchase in Malaysia, but do you know what's under the hood? ...
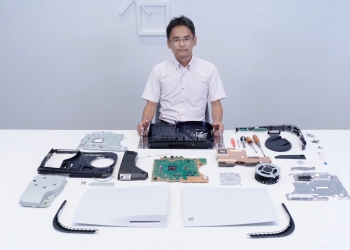
Sony recently released a teardown video of its upcoming PlayStation 5 (PS5) console, giving curious gamers a peek at the ...

The HomePod is finally available at selected markets and this is Apple's smart speaker that comes with built-in Siri. The ...
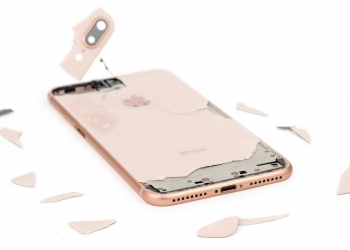
The iPhone 8 should have been called the iPhone 7s. While it gets a whole new number, it looks more ...
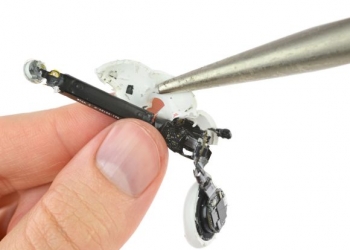
Hate cables and looking for a seamless way to enjoy music on your iPhone? The Apple AirPods are the answer ...
The Galaxy S7 improves in almost every area compared to the Galaxy S6. It gets a bigger battery, support microSD ...
Qualcomm found itself in a cumbersome situation since releasing its flagship processor, the Snapdragon 810 – that's been riddled with ...
Less than a few days since it's become available to the general public, iFixit once again gets their hands on the ...
Not too long ago the Samsung Galaxy S6 edge got a teardown and scored pretty badly in terms of repairability. ...
Looks like Samsung's Galaxy S6 edge is just as difficult to repair as the HTC One M9, as shows by ...